

Copy the callback URL from G360 first. Go to Settings → SSO Settings, turn on Enable single sign-on, and copy the read-only Callback URL from the Identity Provider section. You paste it into Entra below.
Create the app registration
Console: entra.microsoft.com → Identity → Applications → App registrations → New registration.
From the application’s Overview page, copy:
- Application (client) ID — this is your Client ID.
- Directory (tenant) ID — you need this for the issuer URL below.
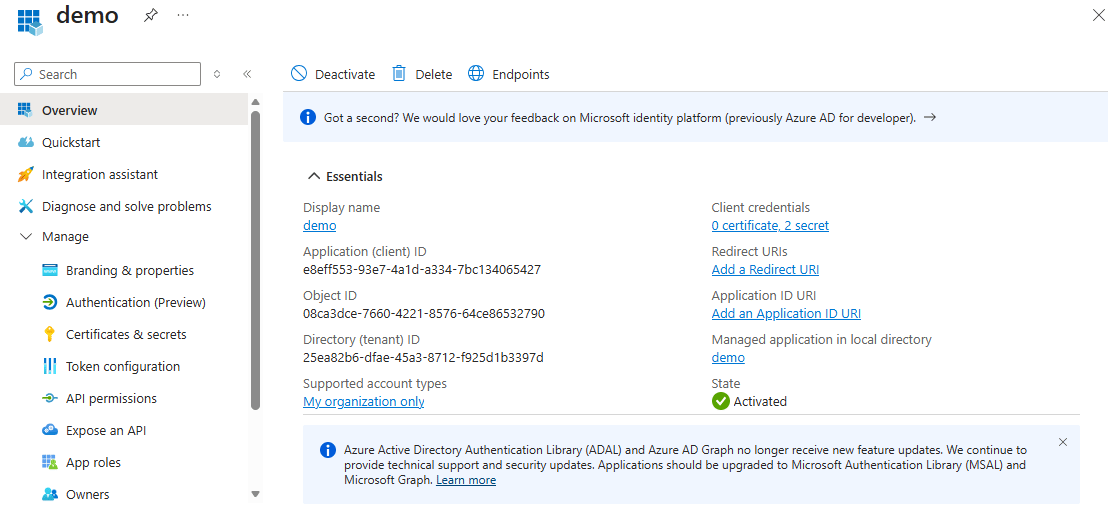
The app registration Overview page, showing the Application (client) ID and Directory (tenant) ID together.
Create the client secret
Certificates & secrets → Client secrets → New client secret.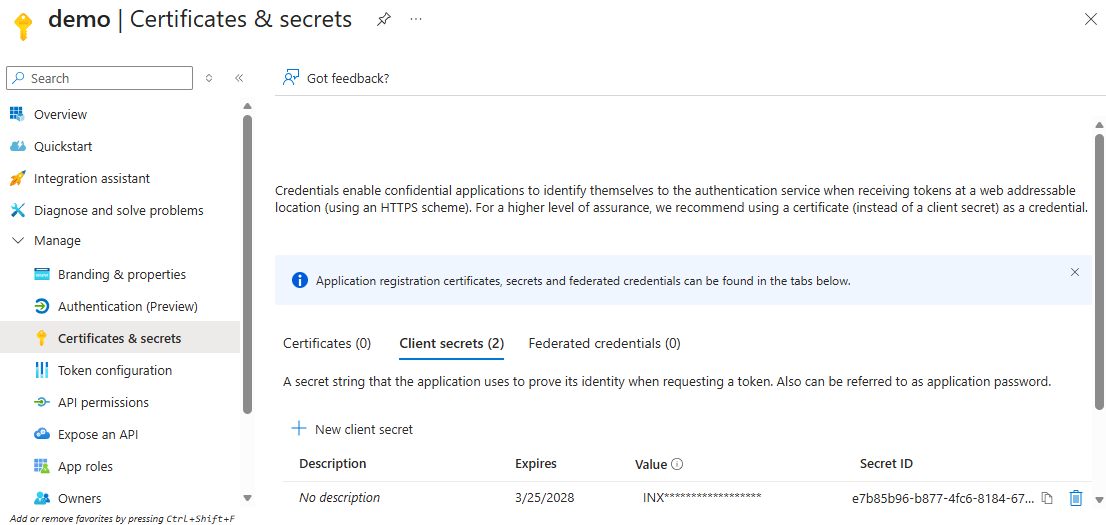
Certificates & secrets after generating a secret — the Value and Secret ID columns sit side by side. Only Value is the credential.
Build the issuer URL
Use the Directory (tenant) ID you copied above:Issuer URL
Consent
G360 requests only theopenid, profile and email scopes, which are user-consentable on a default tenant.
If your organization has disabled user consent, the first person to sign in sees “Need admin approval”. An administrator needs to grant consent on the app once — a smaller request than a full role grant.
Next: enter the details in G360
You now have the Client ID, Client Secret and Issuer URL. Return to Step 5 of the setup guide to enter them, test the connection, and save.SCIM provisioning
First, generate a SCIM token in G360.Create a second application
The app registration you created for SSO cannot be reused — its service principal has no synchronization template, so its Provisioning blade has nothing to configure. Enterprise applications → New application → Create your own application → “Integrate any other application you don’t find in the gallery (Non-gallery)”.Connect it to G360
Provisioning → Get started → Provisioning Mode: Automatic.
Save first, then Enable, then Test Connection. The connection control is inert until the credentials are persisted.
Attribute mapping
Open Provisioning → Attribute mapping:- Open Provision Microsoft Entra ID Groups and set Enabled: No. G360 supports user provisioning only, and leaving Groups mapped fails on every sync cycle.
- In Provision Microsoft Entra ID Users, confirm
externalIdis mapped fromobjectId, notmailNickname. - Confirm Target Object Actions includes Create, Update and Delete.
Scope and assignment
Settings → Scope: “Sync only assigned users and groups.” Assign every user to both applications:- The SSO app — only if its Properties → “Assignment required?” is set to Yes.
- The SCIM app — always required. This is what actually controls who is provisioned and deprovisioned.
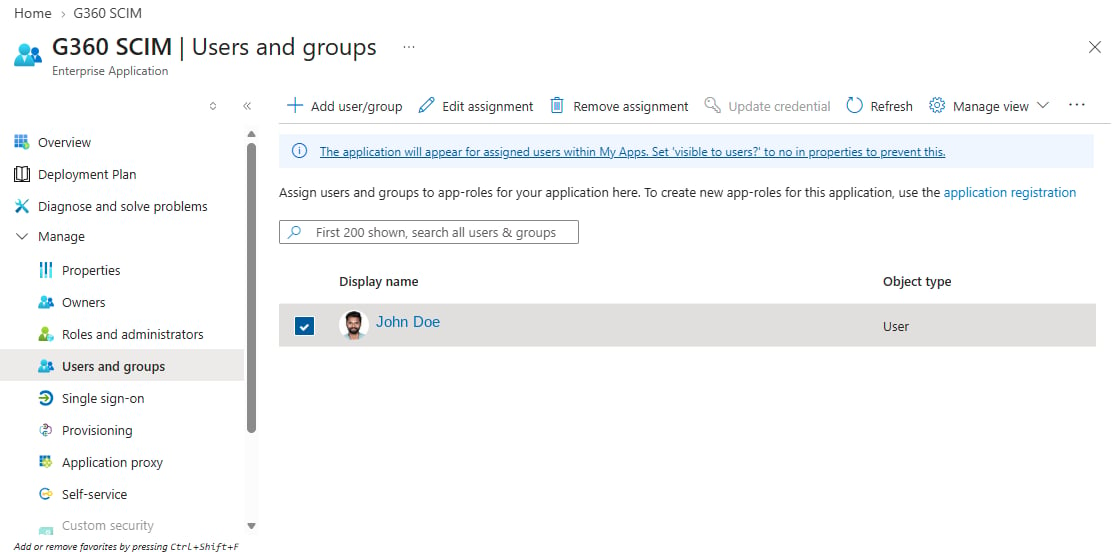
Users and groups on the G360 SCIM enterprise application. Removing someone's assignment here is what deprovisions them in G360.
Provider-specific errors
If Entra’s own screen shows an error before you’re redirected back to G360, the problem is on its side. These carry anAADSTS code, which is precise.
For errors that appear after you’re back in G360, see Troubleshooting.