

Copy the callback URL from G360 first. Go to Settings → SSO Settings, turn on Enable single sign-on, and copy the read-only Callback URL from the Identity Provider section. You paste it into Google below.
Create a project and the consent screen
Console: Google Cloud Console, signed in with the Google account or Workspace that should own this integration. Create or select a project, then go to APIs & Services → OAuth consent screen (shown as Google Auth Platform on newer projects):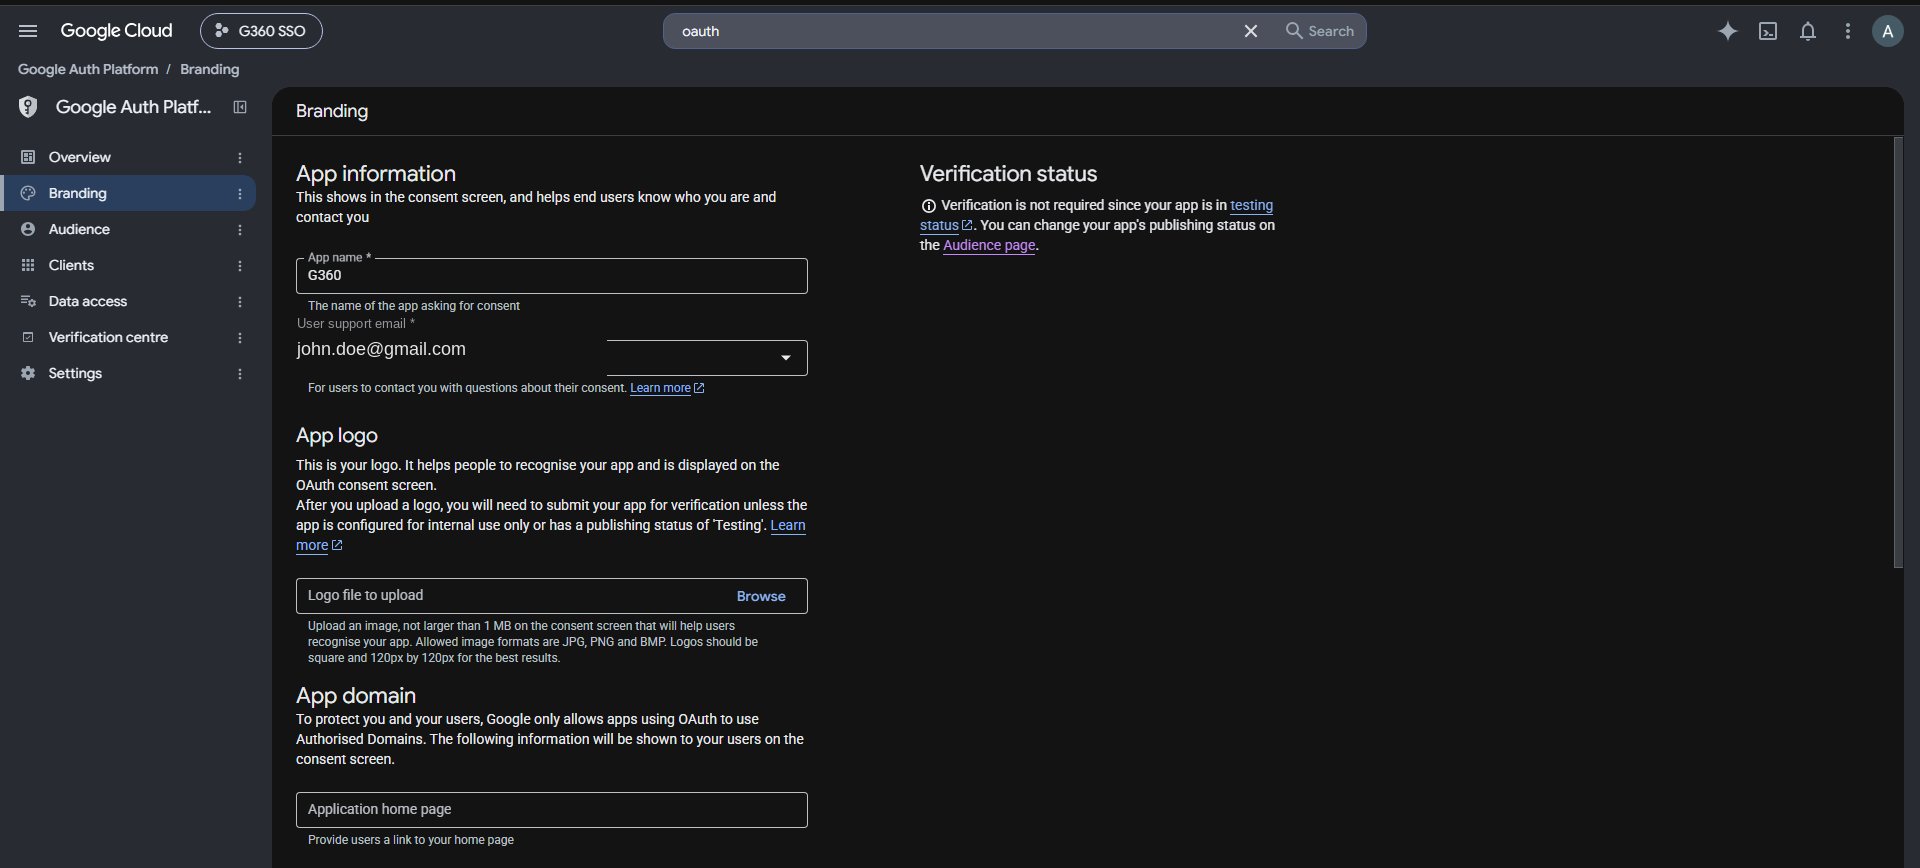
The Branding page — App name and User support email are what appear on the consent screen.
External is correct here, and is not the same as public. “Internal” is only offered on a Workspace organization and restricts sign-in to that organization’s own accounts. Choosing External does not publish the app — it stays in Testing status until you explicitly publish it, which the next step relies on. No sensitive scopes are involved, so Google verification is never required.
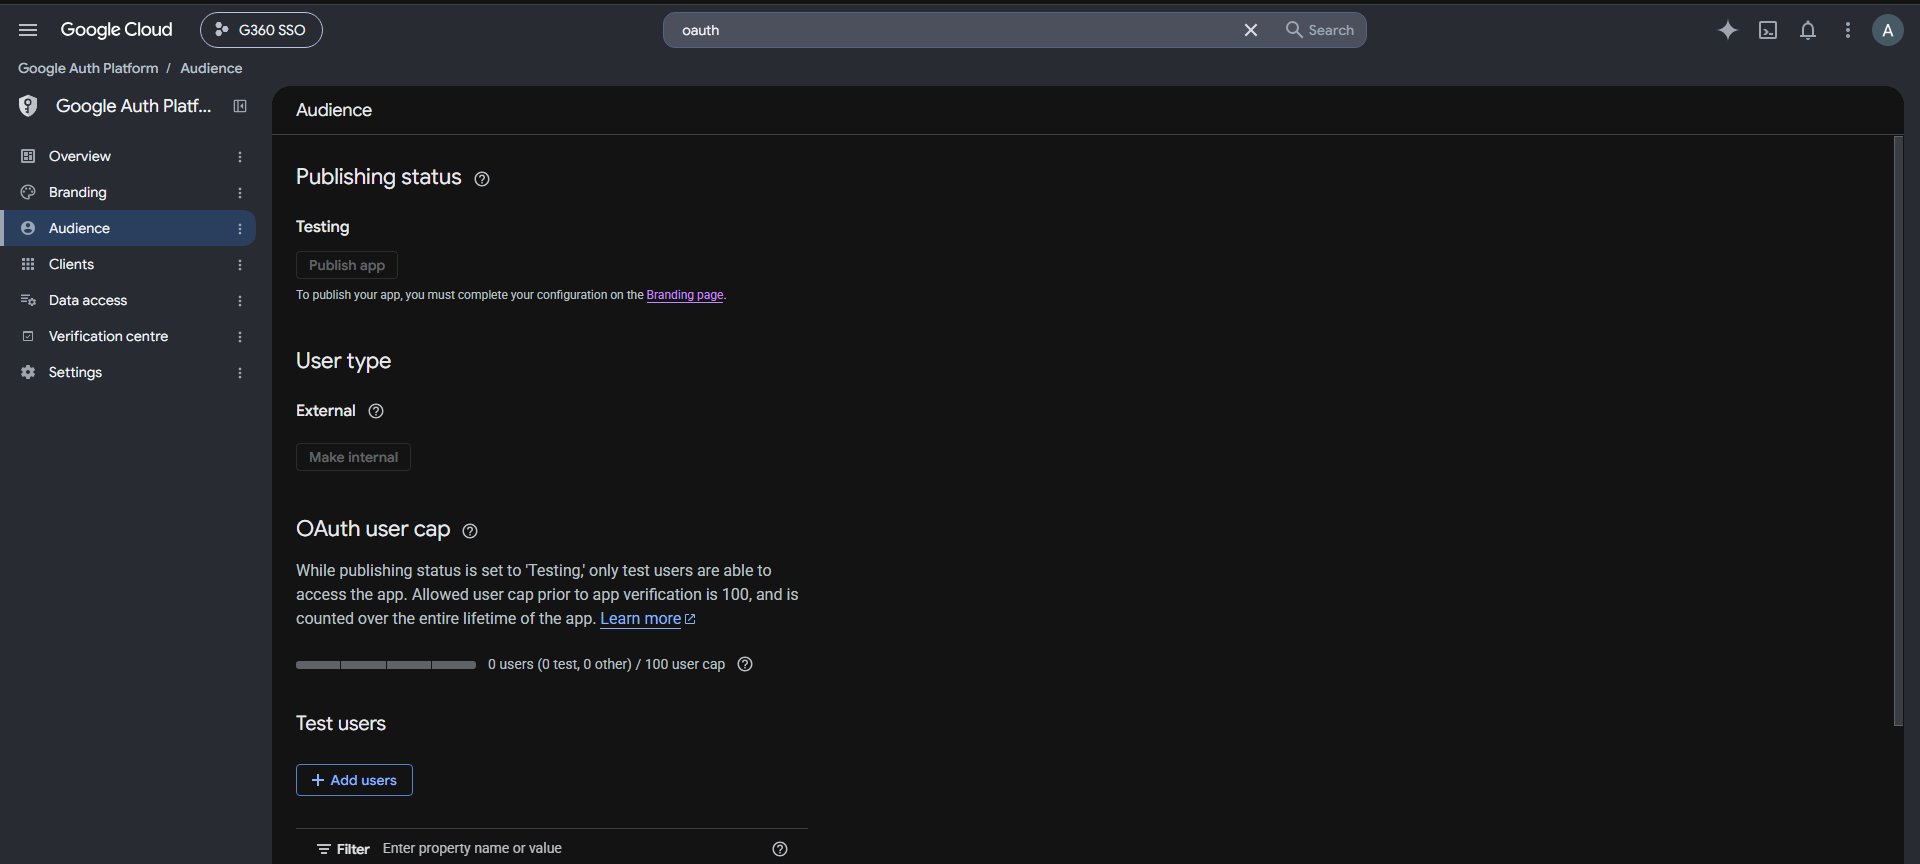
The Audience page, showing publishing status Testing and user type External.
Add test users
Google Auth Platform → Audience → Test users → Add users, and add every account that needs to sign in to G360.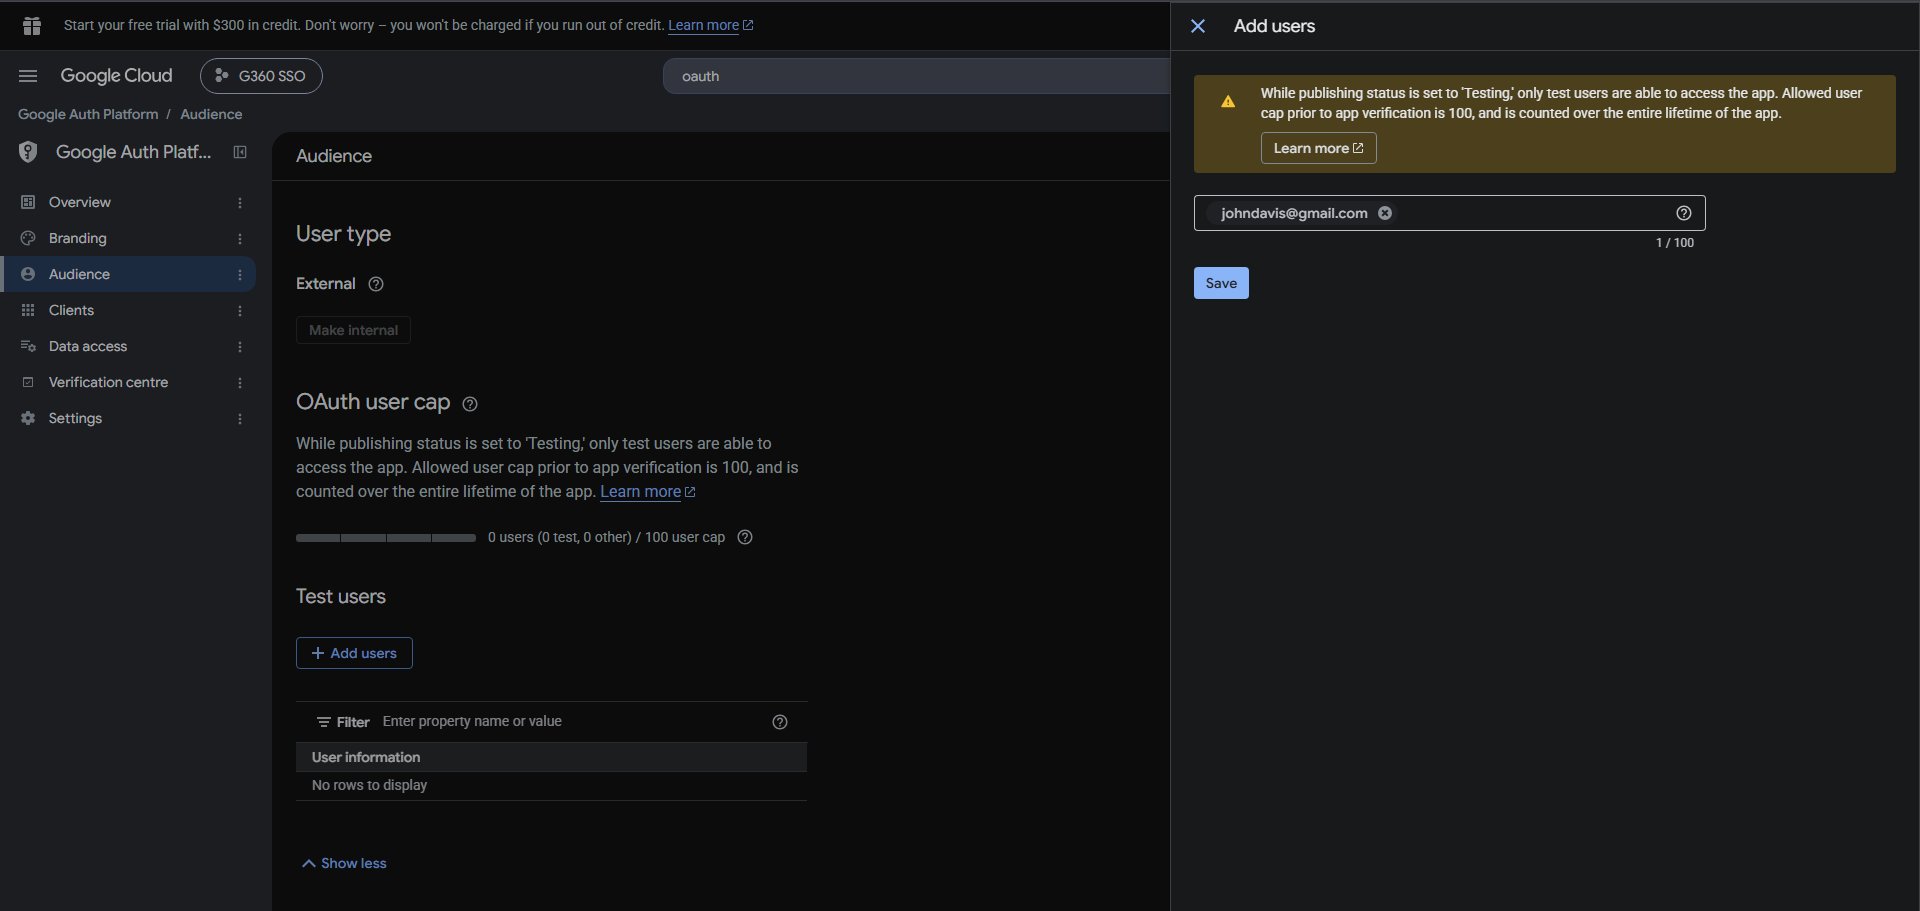
Adding a test user under Audience while the app is in Testing status.
Create the OAuth client
Google Auth Platform → Clients → Create client.
Copy the Client ID and Client Secret from the dialog — the secret is shown once and never again.
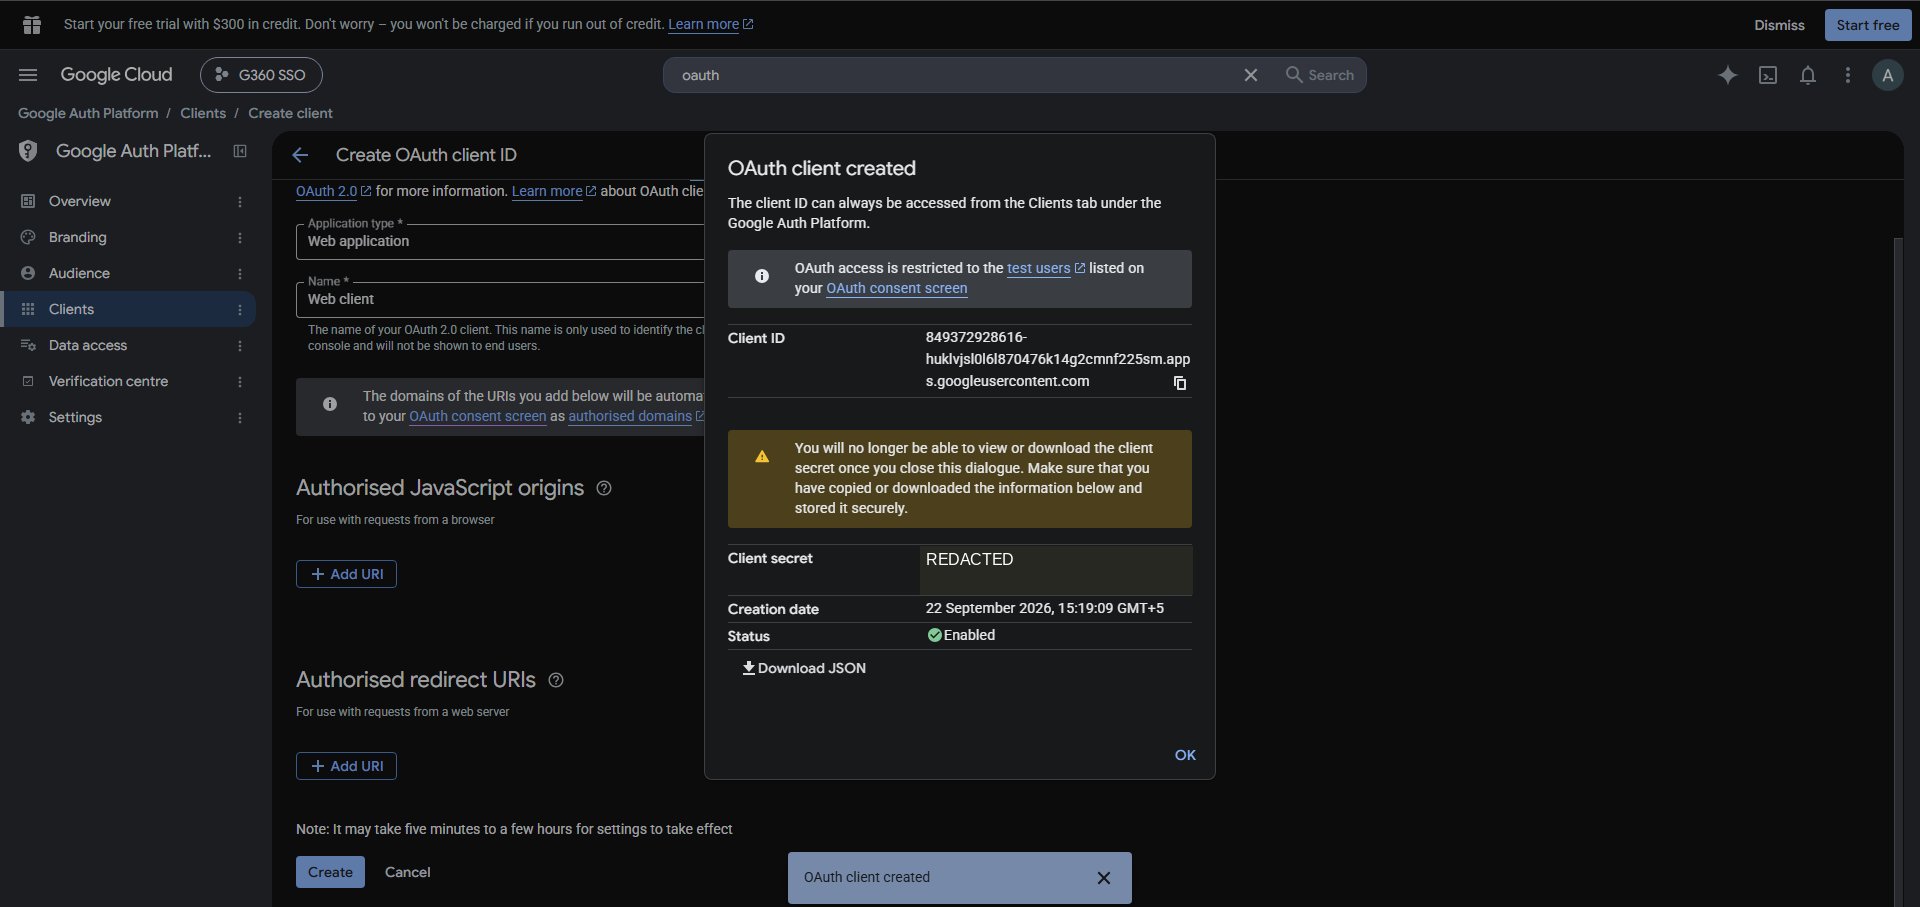
The one-time OAuth client created dialog. The secret is redacted here — copy it before closing, because Google will not show it again.
Issuer URL
Fixed for every Google account, with nothing to look up:Issuer URL
Next: enter the details in G360
You now have the Client ID, Client Secret and Issuer URL. Return to Step 5 of the setup guide to enter them, test the connection, and save.SCIM is not available with Google
Google cannot drive SCIM provisioning to any custom application, including G360, on any Google account type or plan. There is no configuration change, on either side, that enables it — Google’s automated provisioning is limited to catalog applications with pre-built connectors. What to do instead:- Set New-user provisioning to Create automatically on first sign-in in the Access Policy, so accounts are created when people first sign in.
- Handle removals directly in G360 under Administration → User & Team Management.
Provider-specific errors
If Google’s own screen shows an error before you’re redirected back to G360, the problem is on its side.
For errors that appear after you’re back in G360, see Troubleshooting.