Connect Garth to your GitLab.com repositories using a Group Access Token or Personal Access Token for automated code reviews.
Garth supports two token types for GitLab authentication. Use a Group Access Token if you are on GitLab Premium or Ultimate — it creates a managed bot user and simplifies permission management across the organization. Otherwise, use a Personal Access Token from a dedicated service account.
Option A — Group Access Token (recommended for Premium/Ultimate)
Group Access Tokens natively generate a bot user, making permission management much simpler across the organization.
1
Navigate to your group
Open the target group in the GitLab interface.
2
Open Access Token settings
In the sidebar, go to Settings → Access Tokens.
3
Generate the token
Assign Developer access and select the following scopes: api, read_api, read_repository, write_repository, read_user. Click Generate.
GitLab generates a random bot name such as group_102_bot_xyz. Group Administrators can rename the bot or update its avatar via the GitLab API to give Garth’s comments a distinct identity.
Option B — Personal Access Token (for non-Premium tiers)
Do not use a personal user account. Code reviews will be attributed to the token owner. Create a standalone service account named GPRABot exclusively for this integration.
The service account must be added to the relevant project as a Maintainer — this role is required to manage webhooks.
1
Authenticate as the service account
Log into GitLab using the dedicated Garth service account.
2
Open Access Token settings
Click your avatar → Edit Profile → Access Tokens.
3
Name the token
Give the token a clear name such as Garth Bot Key. You can optionally set an expiry date; leaving it blank defaults to 365 days. If the token expires, Garth stops functioning until you replace it in the dashboard.
4
Select token scopes
Enable the following scopes:
api
read_api
read_user
read_repository
write_repository
5
Save the token
Click Create Personal Access Token and copy the token immediately. GitLab will not display it again.
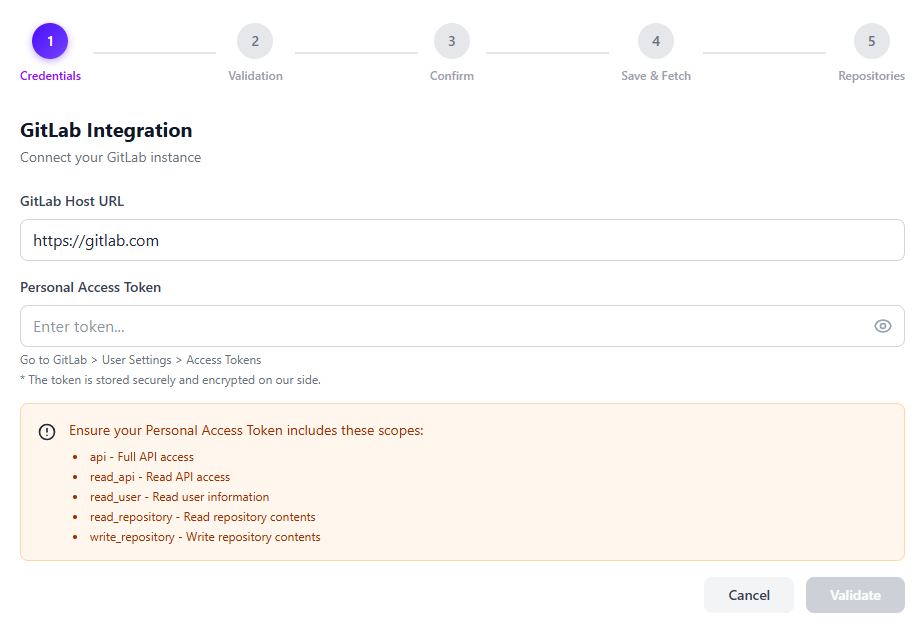
Select the GitLab tab. Enter your GitLab URL (https://gitlab.com)
and the Access Token you just created, then click Validate.
Enter your GitLab URL and Access Token, then click Validate
3
Install repositories
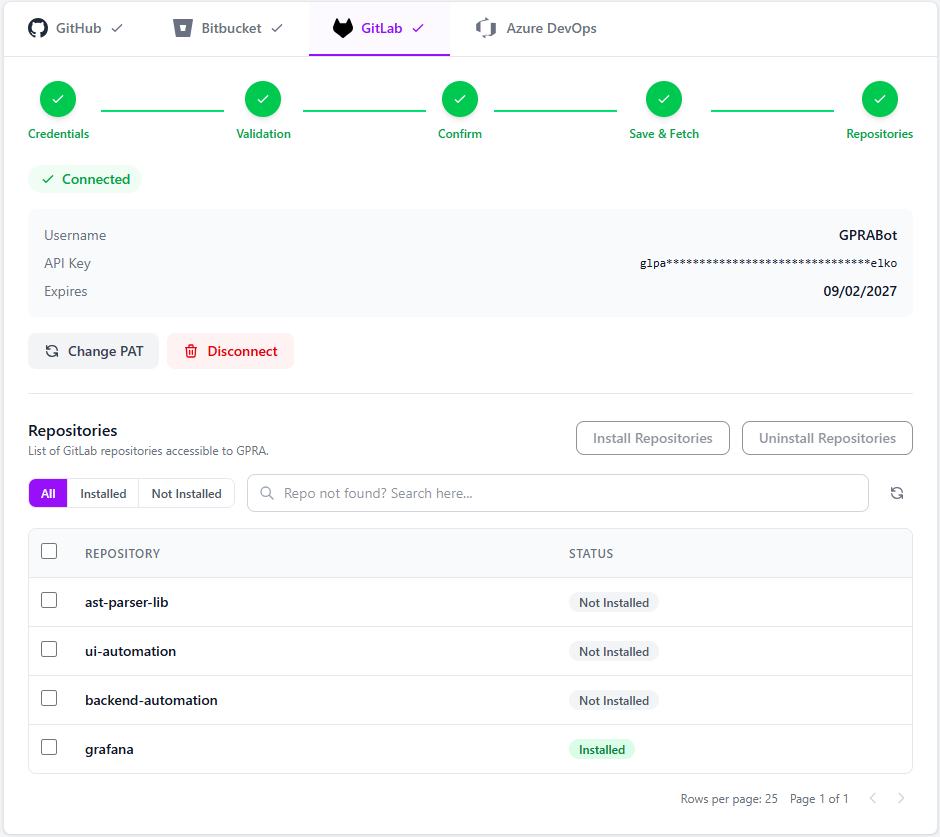
After validation, select the repositories you want Garth to review and click Install Repositories.
Automatic webhooks: Garth installs webhooks on selected repositories automatically. No manual webhook configuration is required. Webhooks are also removed automatically when you uninstall a repository.
Select the repositories you want Garth to review and click Install Repositories
Verify Auto Review is enabled — ensure the Auto Review toggle is turned on for the repository.
Check branch exclusions — confirm the source or destination branch of your MR is not listed under Source Branches to Exclude or Destination Branches to Exclude.
Check file exclusions — verify that the files changed in your MR are not covered by patterns in Files to Exclude.
Authentication errors
If you receive authentication or permission errors:
Check token expiry — GitLab Personal Access Tokens expire based on the date you set (or after 365 days by default). Regenerate and update the token in Garth if it has lapsed.
Confirm the token type — use either a Group Access Token with api scope and Maintainer role, or a Personal Access Token from the dedicated service account — not a personal user account.
Verify Group Owner status — the Garth user initiating the connection must hold GitLab Group Owner status.
Re-authenticate — update the token in Settings → Integrations → GitLab within Garth and re-link with a freshly generated token.