

Copy the callback URL from G360 first. Go to Settings → SSO Settings, select Amazon Cognito, and copy the read-only Callback URL from the Identity Provider section. You paste it into Cognito below.
The three settings that cause most failures
The app client must have a client secret
The app client must have a client secret
Cognito’s Single-page application and Mobile app client types are public clients with no secret. G360 exchanges the sign-in code on its server, so it needs a Traditional web application client. A client’s type can’t be changed after it’s created — if you picked the wrong type, create a new client.
The app client must allow the openid, email and profile scopes
The app client must allow the openid, email and profile scopes
G360 always requests all three scopes. If the app client doesn’t allow every one of them, Cognito refuses the request with
invalid_scope before anyone is asked to sign in.The user pool must have a domain
The user pool must have a domain
Cognito’s sign-in and token endpoints live on the pool’s domain (
https://<prefix>.auth.<region>.amazoncognito.com), not on the issuer host. Without a domain, there is nowhere to send users to sign in.Create the user pool
Console: AWS Management Console, in the AWS region where you want to keep your users. Select the region from the region picker at the top right before you start. Go to Amazon Cognito → User pools and click Create user pool.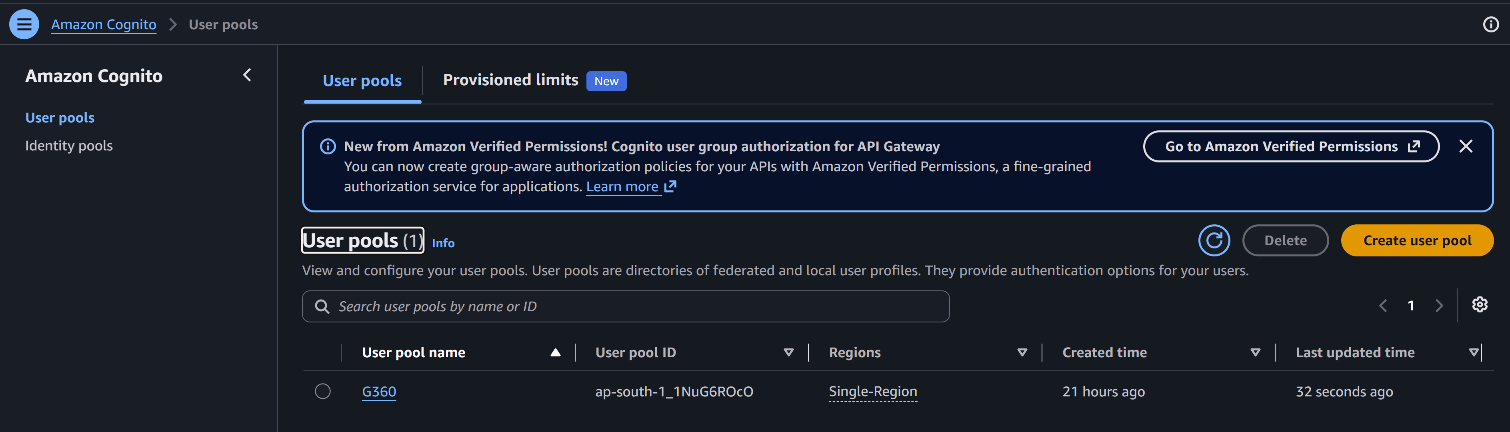
The User pools list. The User pool ID column shows the ID you use to build the issuer URL.
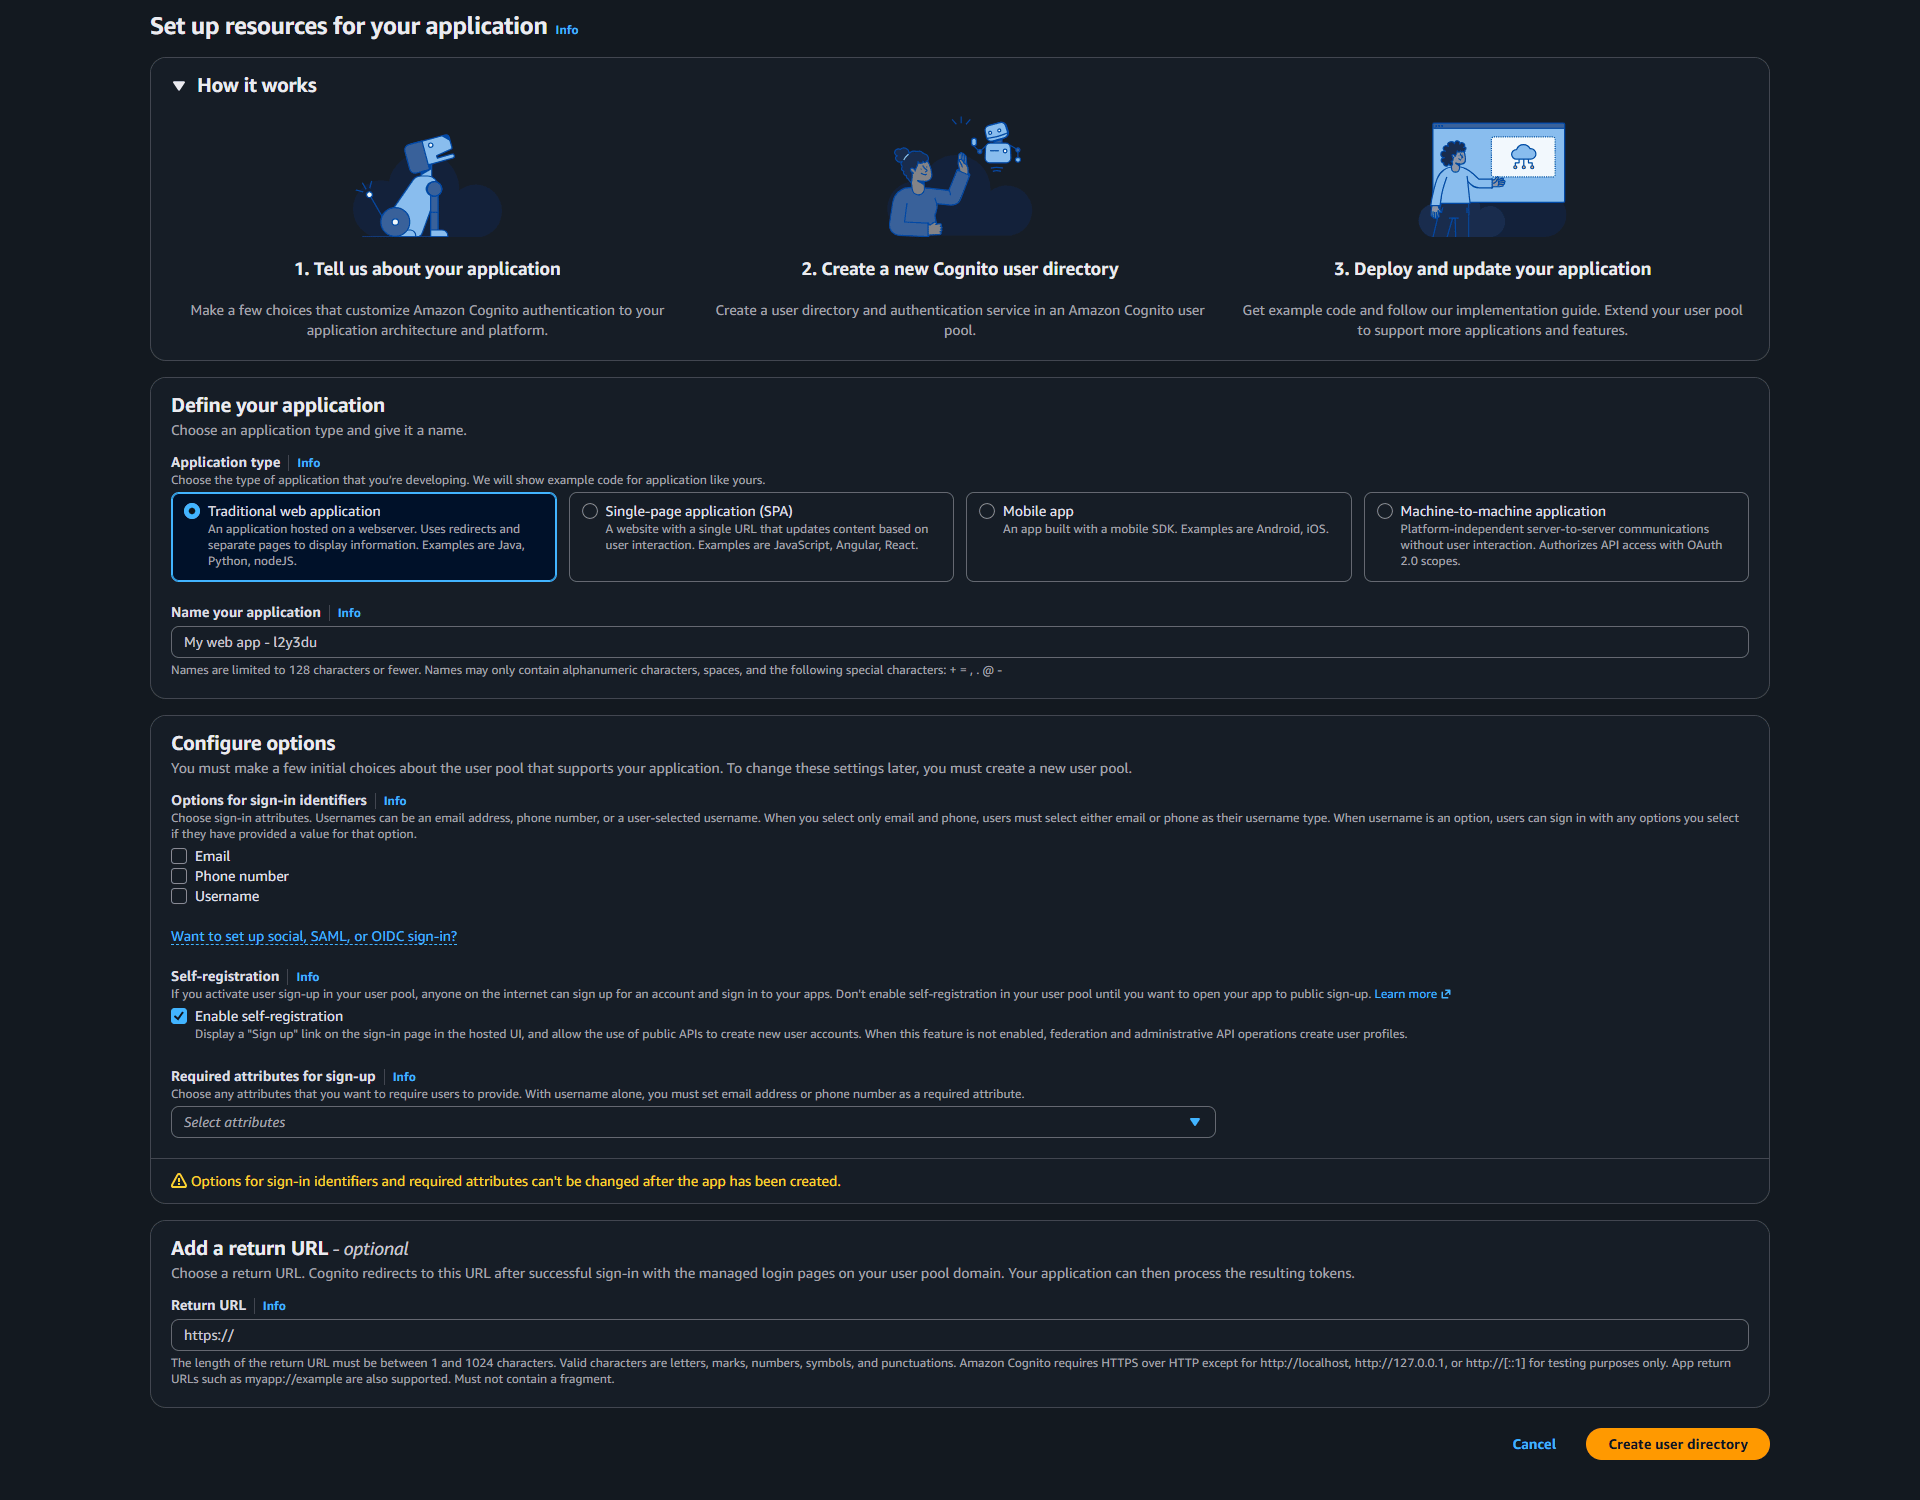
The Set up resources for your application page, where you create the user pool and its first app client.
Define your application
Configure options
Add a return URL
Cognito accepts only HTTPS return URLs, except for
http://localhost, http://127.0.0.1 and http://[::1]. If your G360 instance is served over plain HTTP on any other host, Cognito won’t accept the URL.
Click Create user directory. Cognito creates the user pool, gives it a domain, and creates an app client for G360 with the settings above.
On the User pools list, note the User pool ID — it looks like us-east-1_AbC123xyz. You use it to build the issuer URL.
Create the app client
The app client is the application that represents G360 inside the user pool. If you created a new user pool above, the wizard already created the app client. Skip to Configure the app client. If you’re adding G360 to an existing user pool, go to User pools → (your pool) → Applications → App clients and click Create app client.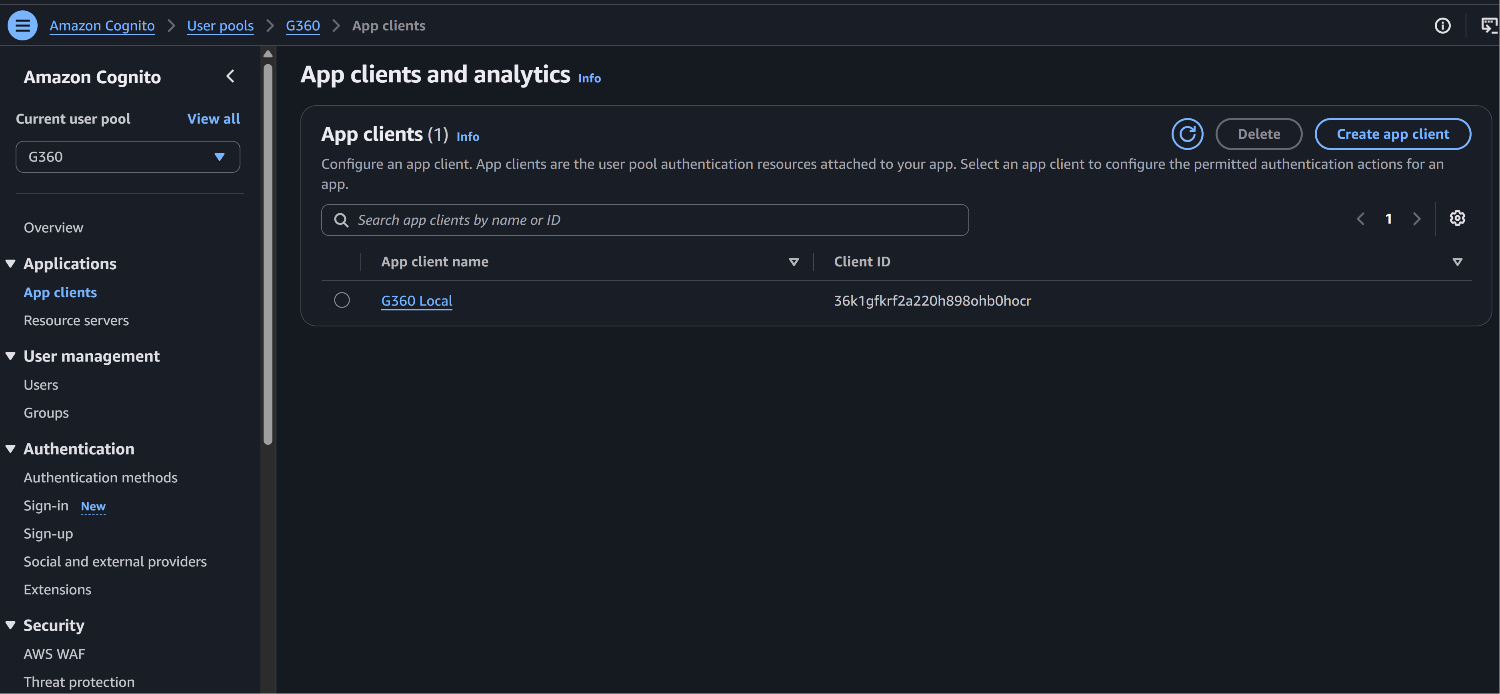
The App clients page for a user pool, with the Create app client button.
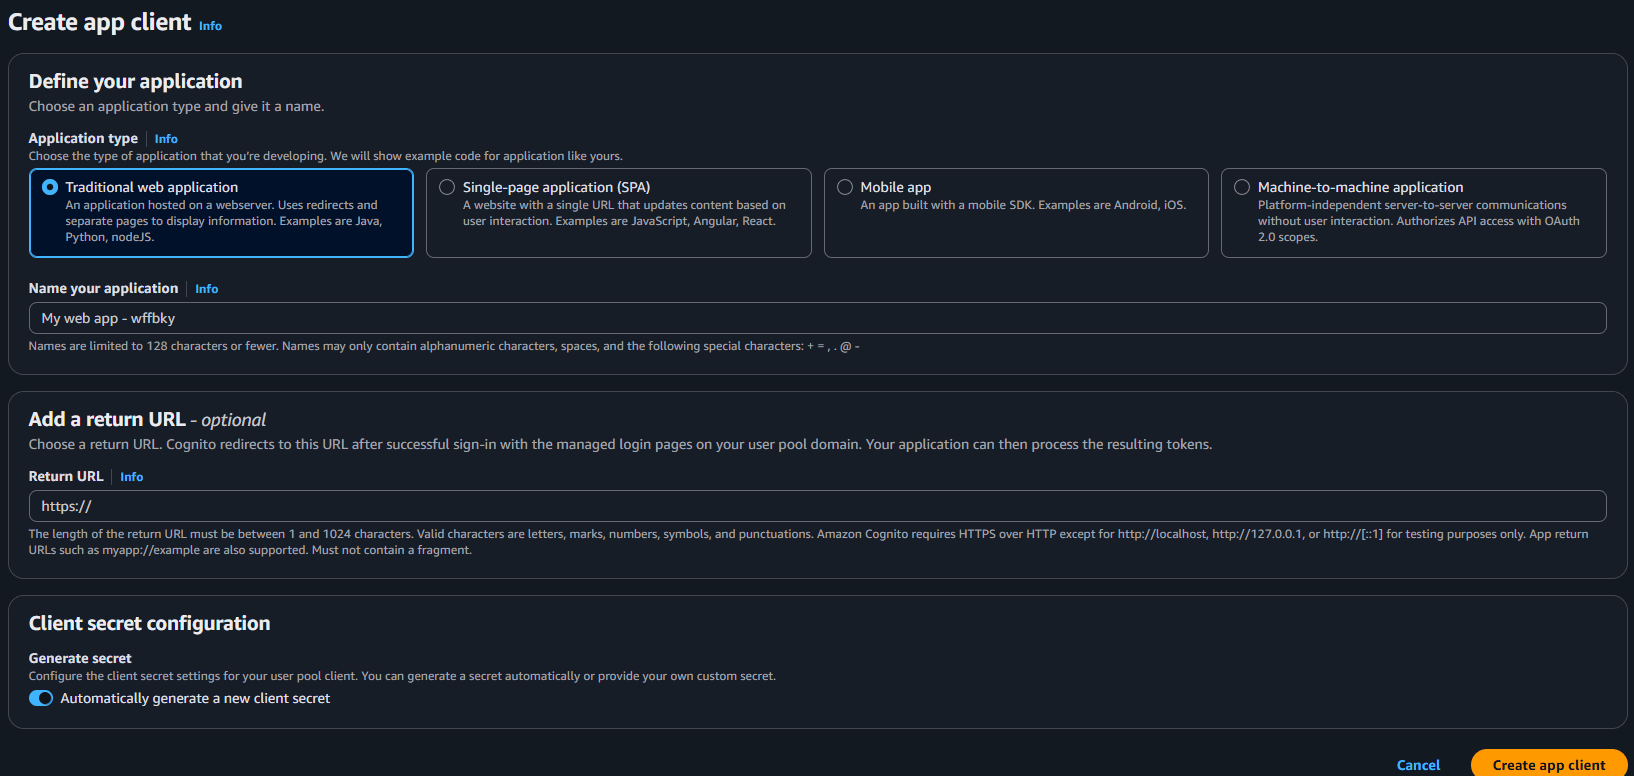
The Create app client page, with the Define your application, Add a return URL and Client secret configuration sections.
Define your application
Add a return URL
Client secret configuration
Click Create app client.
Configure the app client
Open the client from App clients. From App client information, copy:- Client ID — use the copy icon next to it.
- Client secret — turn on Show client secret, or use the copy icon. If there is no Client secret field, the client was created as a public client. Create a new Traditional web application client.
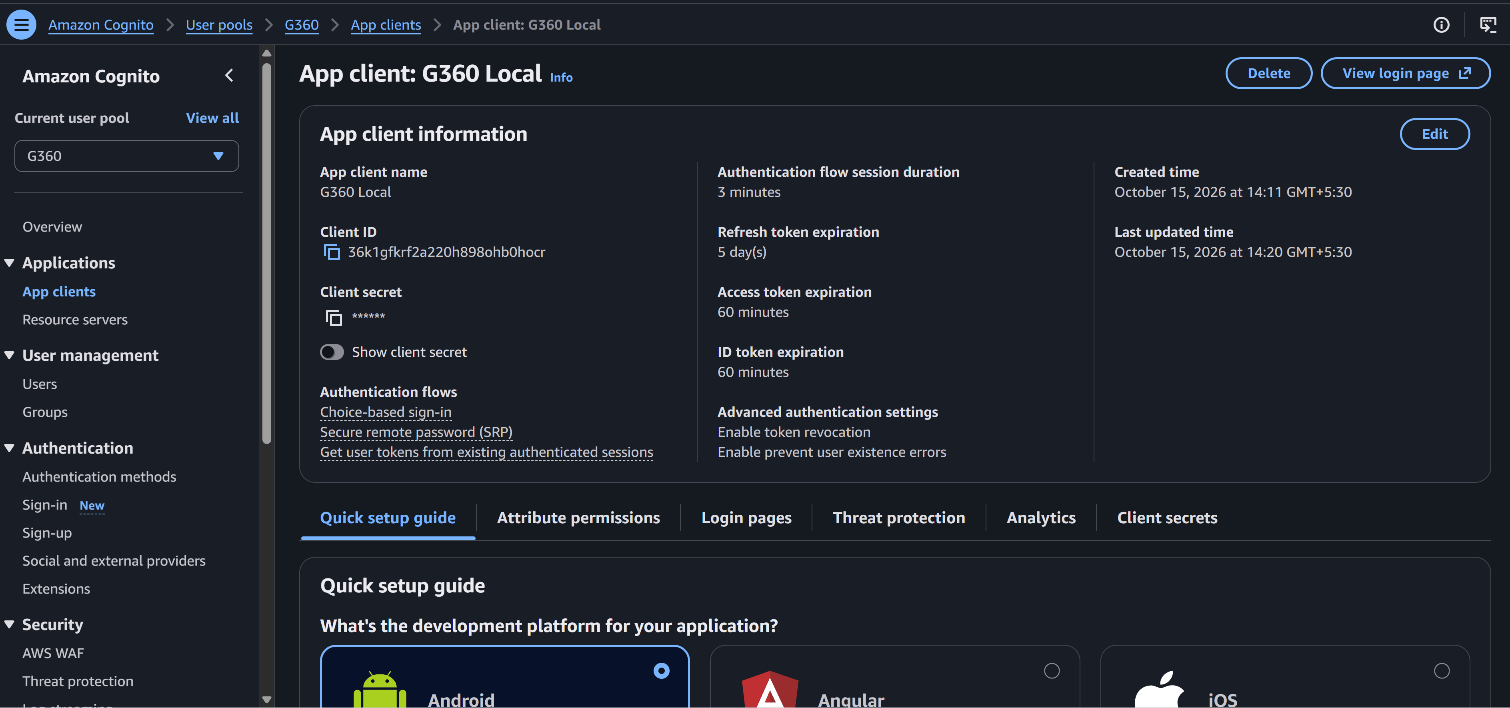
App client information, showing the Client ID and the masked Client secret, with the Login pages and Attribute permissions tabs below.
Cognito accepts only HTTPS callback URLs, except for
http://localhost, http://127.0.0.1 and http://[::1].email, email_verified, given_name and family_name. Read access to all standard attributes is the default. Without these, G360 can’t identify the user or fill in their name.
Make sure user emails are verified
G360 uses a person’s email address to link their first SSO sign-in to an existing G360 account, or to create a new one. A Cognito user pool can hold email addresses that nobody has verified, so G360 refuses a first sign-in from a Cognito user whose email isn’t verified. The user sees a message saying their email address hasn’t been verified. To avoid this:- When you create users yourself, go to Users → Create user and check Mark email address as verified.
- When users sign themselves up, keep Cognito’s email verification turned on so the address is verified during sign-up.
- When your pool federates another provider (Google, a SAML provider, another OIDC provider), map that provider’s
emailandemail_verifiedattributes into the pool. A Cognito sign-in with noemail_verifiedvalue at all is treated as unverified.
This check applies only to a person’s first SSO sign-in. Once their account is linked, G360 recognizes them by Cognito’s permanent user ID (
sub), not by email.Issuer URL
Build the issuer URL from your region and user pool ID:Issuer URL
https://cognito-idp.us-east-1.amazonaws.com/us-east-1_AbC123xyz. You can enter it in G360 with or without /.well-known/openid-configuration at the end.
Cognito has no token endpoint authentication setting to change. It accepts Client Secret Post, which is what G360 uses.
Next: enter the details in G360
You now have the Client ID, Client Secret and Issuer URL. Return to Step 4 of the setup guide, select Amazon Cognito as the identity provider, then enter the values, test the connection, save, and turn on single sign-on.SCIM is not available with Amazon Cognito
Cognito is an identity provider and a user directory, but it has no outbound provisioning feature. Nothing in Cognito calls G360 when a user is created, changed or disabled. There is no configuration change, on either side, that enables it. When the saved identity provider is Amazon Cognito, the SCIM Provisioning section in G360 says SCIM isn’t supported instead of showing the token form. What to do instead:- Set New-user provisioning to Create automatically on first sign-in in the Access Policy, so accounts are created when people first sign in.
- When someone leaves, disable them in Cognito and suspend them in G360 under Administration → User & Team Management.
Provider-specific errors
If Cognito’s own page shows an error before you’re redirected back to G360, the problem is on Cognito’s side.
Errors that appear after you’re back in G360:
For other errors that appear after you’re back in G360, see Troubleshooting.
Known behavior
- Signing out of G360 doesn’t sign you out of Cognito. The next Sign in with SSO in the same browser goes straight through without asking for a password. Use a private window to sign in as a different user.
- Federated users have a
cognito:usernamethat isn’t an email (for examplegoogle_1234…). G360 reads theemailattribute, so map the upstream provider’s email into the pool.